This- For Intel chips: Clash for Windows-0.20.39.dmg
For Apple Silicon (M series): Clash for Windows-0.20.39-arm64.dmg
Or download directly from this site:
- Intel: Clash for Windows-0.20.39.dmg
- Apple Silicon: Clash for Windows-0.20.39-arm64.dmgexplains how to install and configure the Clash for Windows app to connect to this private VPN. Yes, the name is a bit odd: it's for macOS but called "Clash for Windows". I'm very sure this is the correct app.
1. Download and Installation
First, confirm your CPU:
- For Intel chips: Clash for Windows-0.20.39.dmg
- For Apple Silicon (M series): Clash for Windows-0.20.39-arm64.dmg
Or download directly from this site: - Intel: Clash for Windows-0.20.39.dmg - Apple Silicon: Clash for Windows-0.20.39-arm64.dmg
2. Configuration and Activation
macOS configuration requires editing a text file directly.
First, right-click the Clash icon → Run as Administrator, then go to Home → Service Mode → Manage → Install to install the system service. Restart the app afterward.

Go to the Profiles tab, locate the default
config.yaml, click<>to open the built-in editor, or manually find it atC:\Users\[YourUserName]\.config\clash\config.yaml.
In
config.yaml, the circled section in the screenshot should NOT exist. If present, delete it.Open the
txtfile from Jungle0128 containing your dedicated settings. Copy the block starting withproxiesinto the position shown inconfig.yaml.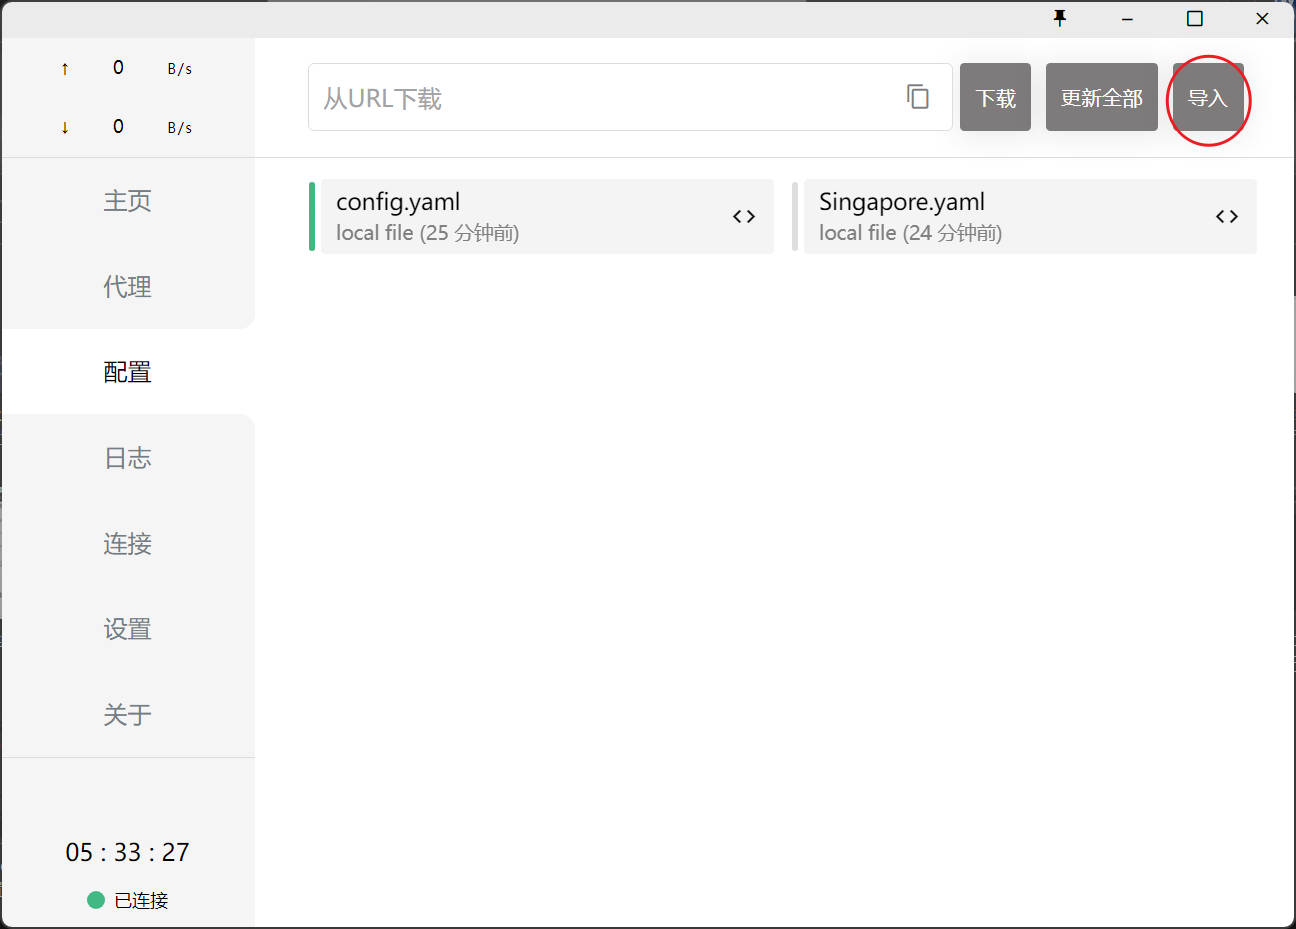
Save and close
config.yaml.
3. Connection and Disconnection
Back in the main window, open the Proxy tab. Under Global, select v2ray-ws-tls. Tap Test; latency should appear. The screenshot shows 1653 ms from Finland; in China it’s typically 30–100 ms.
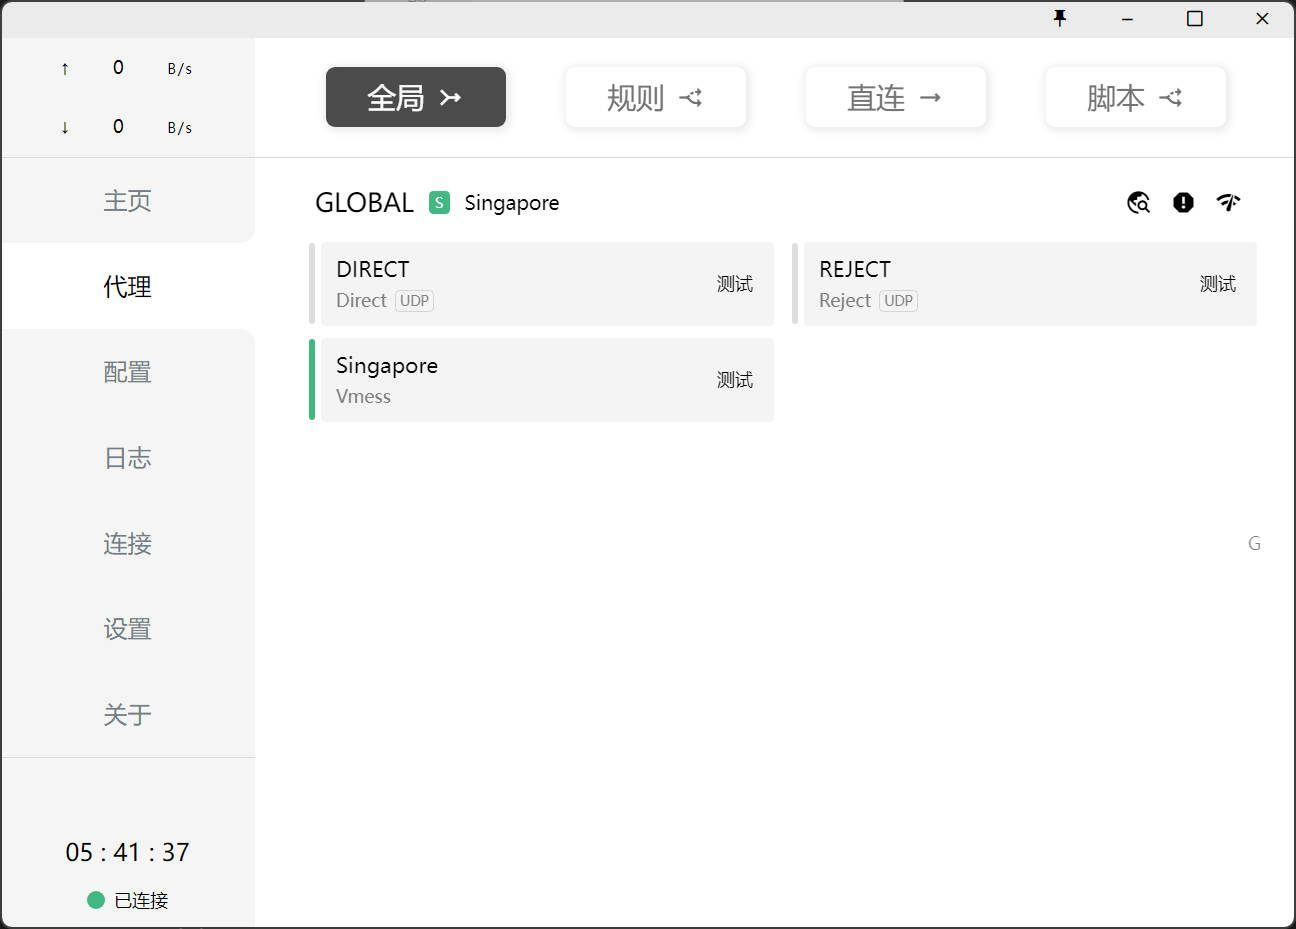
Return to Home.
Turn on all three switches:
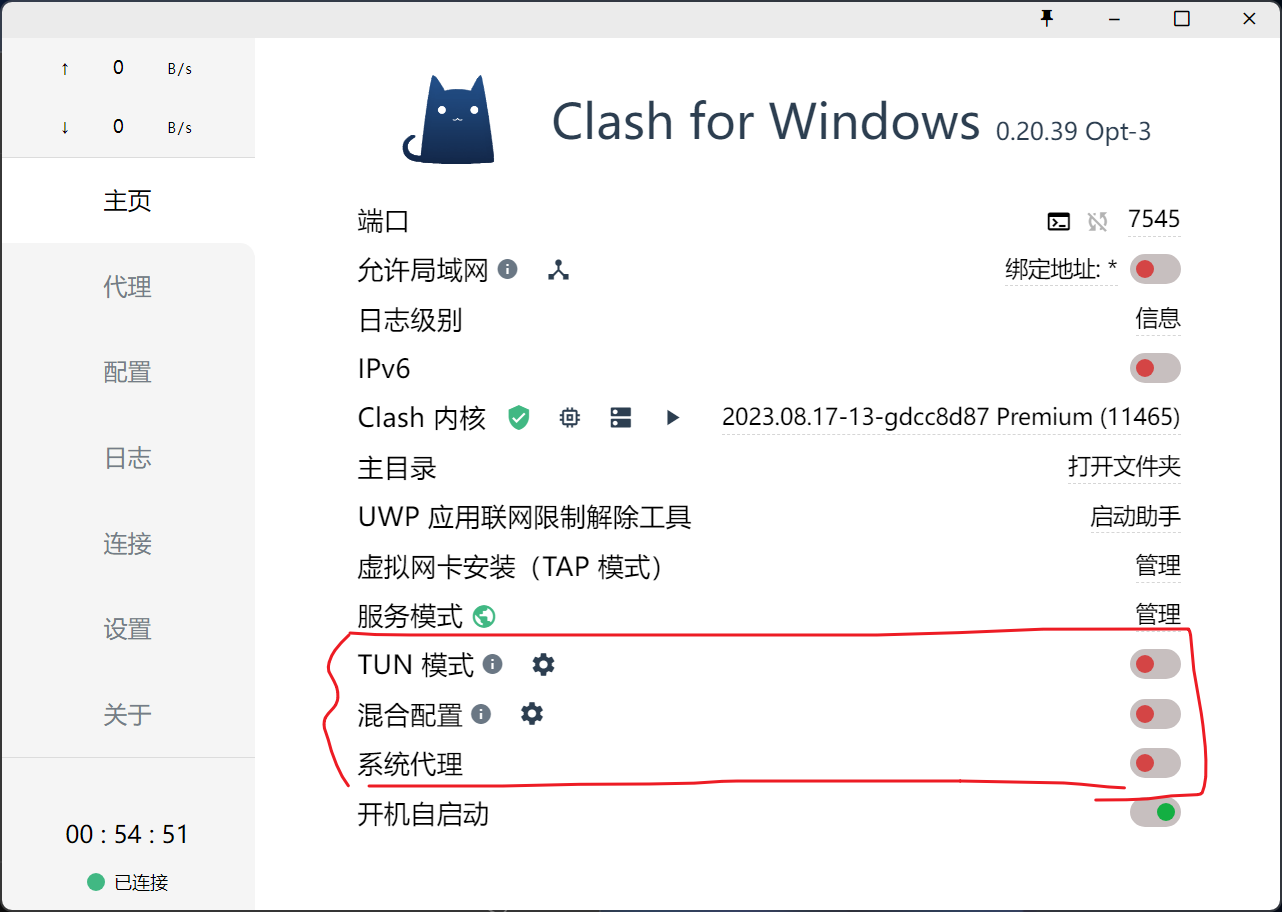
TUN Mode (Outbound Connectivity / TUN Mode)
Mix-in
System Proxy
The VPN is now active. You can search "IP address" on Google to verify; it should show your IP is in Japan.
To disconnect, simply turn these three switches off.